ridgeway by kelty tent assembly instructions

The Ridgeway by Kelty Tent is a popular choice for campers, known for its durability and spacious design. It features two rooms, offering ample space for comfort during outdoor adventures. The tent is designed with color-coded clips and poles, simplifying the assembly process. Its sturdy construction and weather-resistant materials make it ideal for various camping conditions. Whether for family trips or group outings, the Ridgeway tent provides a reliable shelter, ensuring a pleasant camping experience.
1.1 Overview of the Tent’s Features
The Ridgeway by Kelty Tent is a versatile and durable camping shelter designed for outdoor enthusiasts. It features a two-room design, offering ample space for gear and occupants. The tent includes color-coded clips and poles for easy assembly, reducing setup time. Made with high-quality, weather-resistant materials, it ensures protection from the elements. The freestanding design allows for flexibility in placement, while the DAC aluminum poles provide strength and stability. With a capacity to sleep up to four people comfortably, this tent is ideal for family trips or group adventures; Its lightweight yet robust construction makes it suitable for both backpacking and car camping scenarios.
1.2 Importance of Proper Assembly
Proper assembly of the Ridgeway by Kelty Tent is crucial for ensuring structural integrity, weather resistance, and safety. Incorrect assembly can lead to issues such as poles snapping, uneven tent stands, or poor sealing, which may compromise its performance; Additionally, improper staking or attachment of components can result in the tent being unstable in windy conditions or vulnerable to water ingress. By following the assembly instructions carefully, you ensure the tent provides reliable shelter and withstands harsh weather conditions. Proper assembly also extends the tent’s lifespan, making it a worthwhile investment for future camping trips. Always double-check each step for a secure and durable setup.

Unboxing and Inventory
Welcome to the Ridgeway by Kelty Tent unboxing! Inside, you’ll find the tent body, poles, rain fly, stake sack, stakes, and guy lines. Verify all components are included before starting assembly.
2.1 Identifying All Components
Start by identifying all components included with your Ridgeway by Kelty Tent. The package includes the tent body, a short DAC Featherlite NSA aluminum pole, a tent fly, and a small stake sack containing aluminum tent stakes. Additionally, you’ll find guy lines and clips for securing the tent. Ensure each item is accounted for before proceeding. The tent poles are color-coded to match corresponding clips on the tent, simplifying the assembly process. Proper identification of each part is crucial for a smooth setup experience.
2.2 Checking for Completeness
Before assembling your Ridgeway by Kelty Tent, ensure all components are present and undamaged. Verify the tent body, rain fly, poles, stakes, and guy lines are included. Check for the short DAC Featherlite NSA aluminum pole and the small stake sack containing aluminum stakes. Examine the tent body for color-coded clips, which correspond to specific poles. Inspect the rain fly for proper fit and attachment points. Ensure no parts are bent, torn, or missing. This step is crucial to avoid delays during assembly. If any items are missing or damaged, contact the manufacturer or supplier for assistance before proceeding.
Before You Start
Gather all components and ensure the area is clear of debris. Familiarize yourself with the color-coded clips and poles to streamline the assembly process. Organize parts to save time and avoid confusion during setup.
3.1 Choosing the Right Campsite
Selecting a suitable campsite is crucial for a safe and enjoyable experience. Look for flat ground to ensure even tent setup and stability. Avoid low-lying areas prone to water accumulation. Ensure the site is clear of rocks, sticks, and other debris that could damage the tent. Opt for a spot with some shade to regulate temperature. Verify that the area is dry and free from standing water to prevent moisture issues. Properly positioning the tent on a well-chosen site enhances its performance and longevity. Always check local camping regulations and respect the environment.
3.2 Preparing the Tent Components
Before starting the assembly, ensure all components are ready and organized. Unpack the tent body, poles, rain fly, stakes, and guy lines. Check each part for damage or bends, especially the aluminum poles. Use the color-coded clips and sleeves to match poles with their corresponding sections. Lay out the tent body on a clean, flat surface, smoothing any wrinkles. Attach the clips to the poles according to the color coding for easier assembly. Keep the rain fly and stakes nearby for later steps. Organizing components beforehand saves time and reduces the risk of mistakes during setup. Proper preparation ensures a smooth and efficient assembly process.

Step-by-Step Assembly
Attach poles to the tent body using color-coded clips, stand the tent upright, secure the rain fly, and stake down tightly for stability and protection from weather.
4.1 Attaching the Tent Poles
To attach the tent poles, begin by matching the color-coded clips on the tent body with the corresponding poles. Gently insert the pole tips into the designated sockets and guide the poles through the sleeves. Ensure each pole is fully seated and secure. Use the DAC Featherlite NSL aluminum poles for durability. Once all poles are in place, the tent frame should start to take shape, providing structural support. Double-check each connection to confirm they are snug and properly aligned for stability.
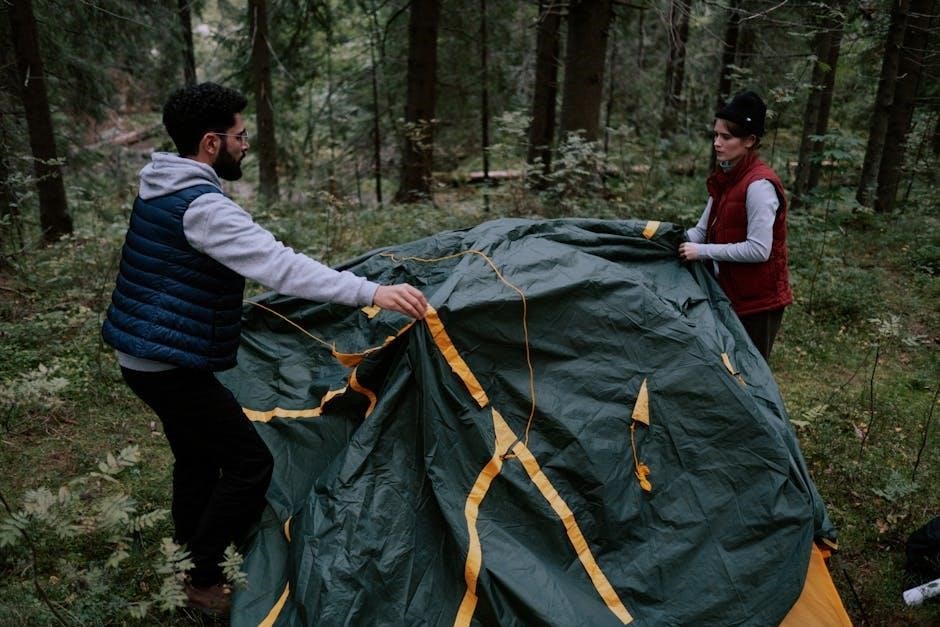
4.2 Standing the Tent Up
Once the poles are securely attached, carefully lift the tent by the hubs and stand it upright. Ensure the poles are fully extended and the fabric is not twisted. This step may require two people for stability. Hold the tent firmly by the top hubs and guide it upward, maintaining balance to prevent it from tipping. Make sure the poles are vertically aligned and the tent body is evenly spread. Once upright, inspect the structure to ensure all poles are properly seated and the fabric is taut. This step is crucial for maintaining the tent’s stability and preparing it for staking down securely.
4.3 Attaching the Rain Fly
After the tent is standing, locate the rain fly and align it with the top of the tent body. Start by attaching the fly to the front of the tent using the color-coded clips. Ensure the fly is centered and evenly spread to avoid wrinkles. Secure the rear of the fly in the same manner, tightening the clips firmly. Use the short DAC pole to attach the center of the fly to the top of the tent, creating a snug fit. Adjust the fly for proper tension, ensuring it is not sagging or loose. This step is essential for weatherproofing and maintaining the tent’s structural integrity during rainfall or windy conditions.
4.4 Staking Down the Tent Securely
Once the tent is fully assembled, secure it to the ground using the provided aluminum stakes; Start by staking the corners firmly, ensuring the tent is tight and evenly spread. Work your way around the perimeter, staking at each clip and loop to maintain stability. Use the color-coded clips to align the tent body with the stakes. For added security, stake the rain fly’s edges, ensuring it is tightly fastened to prevent wind and water penetration. Finally, check all stakes to ensure they are driven in at a 45-degree angle for maximum hold. This step ensures the tent remains stable and secure in various weather conditions.
Tips for Faster Setup
Organize components beforehand and practice assembly to familiarize yourself with the process. Use color-coded clips to quickly identify pole connections, saving time during setup. A helper can assist, ensuring a smoother and faster tent assembly experience.
5.1 Organizing Components
Organizing components is crucial for efficient tent setup. Separate poles, stakes, and fabric to avoid confusion. Use the provided storage sacks to keep items tidy. Labeling each part helps in quickly identifying what goes where. Familiarize yourself with the color-coded clips and poles to ensure correct connections. Lay out the tent body and fly flat on the ground before assembling. Having all tools like the mallet and stake hooks within reach prevents delays. A well-organized setup reduces stress and saves time, especially for first-time users. This step ensures you can focus on assembling rather than searching for missing pieces.
5.2 Using Color-Coded Clips
The Ridgeway by Kelty Tent features color-coded clips, designed to simplify the assembly process. Match the colored clips on the tent body to the corresponding poles for a secure and proper connection; This system ensures that each pole is attached to the correct position, reducing confusion and saving time. By following the color-coding, you can quickly identify where each component goes, even for first-time users. This innovative feature helps prevent errors and speeds up the setup process, making it easier to enjoy your camping experience. Always double-check the connections to ensure they are secure and properly aligned for stability.

Common Mistakes to Avoid
Ensure poles are fully seated and clips are securely attached. Avoid over-tightening stakes, as this can damage fabric. Proper alignment prevents structural issues.
6.1 Incorrect Pole Attachment
Incorrect pole attachment is a common mistake that can lead to a unstable tent structure. Always ensure that the poles are fully seated into their respective hubs and that the ends are securely clipped to the tent corners. Mixing up the pole lengths or attaching them to the wrong hubs can cause the tent to lean or sag. Double-check the color-coding on the poles and clips to ensure proper alignment. If the poles are not fully engaged, the tent may not stand upright, leading to poor weather resistance and potential damage to the fabric or poles during windy conditions.
6.2 Inadequate Staking
Inadequate staking is another common mistake that can compromise the tent’s stability. Always use the provided stakes and ensure they are driven firmly into the ground at a 45-degree angle. Skipping stakes or not tightening them properly can lead to the tent flapping in the wind, causing damage to the poles or fabric. Pay extra attention to the corners and rain fly attachments, as these areas are most vulnerable. Use high-quality stakes suited for the terrain, and double-check that all stakes are securely in place before finalizing the setup. Proper staking ensures the tent remains upright and secure, even in windy conditions.

Maintenance and Storage
Regular maintenance ensures longevity. Clean the tent with mild soap and water, avoiding harsh chemicals. Store in a cool, dry place, fully dried to prevent mold. Always keep components organized in the provided bag to avoid damage or loss.
7.1 Cleaning the Tent
Regular cleaning is essential to maintain the tent’s condition. Start by brushing off dirt and debris with a soft-bristled brush. For tougher stains, mix mild soap with warm water and gently scrub using a non-abrasive sponge. Avoid harsh chemicals or abrasive cleaners, as they may damage the fabric. Rinse thoroughly with clean water to remove soap residue. Allow the tent to air dry completely, ensuring no moisture remains to prevent mold or mildew. Never machine wash or dry the tent, as this can damage the waterproof coating and seams. Proper cleaning ensures the tent remains durable and weather-resistant for future use.
7.2 Proper Storage Techniques
After cleaning, store the tent in a cool, dry place to prevent moisture buildup. Use the provided storage bag or a breathable fabric bag to keep the tent protected. Avoid compressing the tent tightly, as this may damage the poles or fabric. Store the poles, stakes, and rain fly separately to prevent accidental damage. Ensure all components are completely dry before storage to avoid mold or mildew. Regularly inspect the tent for wear and tear, and address any issues promptly. Proper storage ensures the tent remains in excellent condition for future camping trips. Always follow the manufacturer’s guidelines for storage to maintain warranty validity and longevity.


Leave a Reply
You must be logged in to post a comment.