honeywell 9000 installation manual
Welcome to the Honeywell 9000 Installation Manual, your guide to installing and configuring the Honeywell Wi-Fi Thermostat 9000. This manual provides step-by-step instructions for a seamless setup.
- Learn about system requirements and safety precautions.
- Discover key features like Wi-Fi connectivity and programmable scheduling.
- Follow detailed wiring and mounting instructions.
Ensure proper installation for optimal performance and energy efficiency.
1.1. Overview of the Honeywell Wi-Fi Thermostat 9000
The Honeywell Wi-Fi Thermostat 9000 is a cutting-edge, color touchscreen device designed for smart home comfort. It features Wi-Fi connectivity, enabling remote access and programming via the Total Connect Comfort app. With a user-friendly interface, it allows for seamless scheduling and temperature adjustments. The thermostat supports various HVAC systems, including heat pumps and multi-stage systems, ensuring compatibility with most homes. Its energy-saving features and advanced settings help optimize heating and cooling efficiency, making it a versatile and modern solution for home climate control.
- Color touchscreen for easy navigation.
- Wi-Fi enabled for remote monitoring.
- Programmable scheduling options.
- Smart home integration capabilities.
1.2. Key Features of the Honeywell 9000 Thermostat
The Honeywell 9000 Thermostat boasts an array of innovative features, including a vibrant color touchscreen, 7-day programmable scheduling, and Wi-Fi connectivity for remote access. It supports geofencing, smart alerts, and energy usage reports, enhancing user control and efficiency. Compatibility with smart home systems like Amazon Alexa and Google Home further elevates its functionality. The thermostat also includes advanced features like humidity control and multi-stage heating and cooling, ensuring precise comfort management. These features collectively make the Honeywell 9000 a standout choice for modern smart homes.
1.3. Importance of Proper Installation
Proper installation of the Honeywell 9000 Thermostat is crucial for ensuring optimal performance, safety, and energy efficiency. Incorrect wiring or setup can lead to system malfunctions, reduced efficiency, or even safety hazards. A correct installation guarantees compatibility with your HVAC system, ensuring accurate temperature control and smooth operation. It also prevents potential damage to the thermostat or heating/cooling equipment. By following the manual’s guidelines, you can avoid common issues and enjoy reliable, long-term performance from your Honeywell 9000 Thermostat.

Pre-Installation Requirements
Ensure compatibility with your HVAC system, gather necessary tools, and shut off power before starting the installation for a safe and successful setup process.
- Check system compatibility.
- Gather tools and materials.
- Shut off power supply.
2.1. System Compatibility Check
Before installing the Honeywell 9000 thermostat, ensure your HVAC system is compatible. Verify if your system supports the thermostat’s advanced features, such as Wi-Fi connectivity and programmable scheduling. Check the number of heating and cooling stages your system supports and confirm terminal designations. If your system lacks a C (common) terminal, consult your system manual for alternatives. Proper compatibility ensures seamless operation and optimal performance. Refer to Honeywell’s compatibility guide or contact customer support if unsure.
- Verify HVAC system type (heat pump, conventional, etc.).
- Check the number of heating/cooling stages.
- Confirm terminal designations match your system.
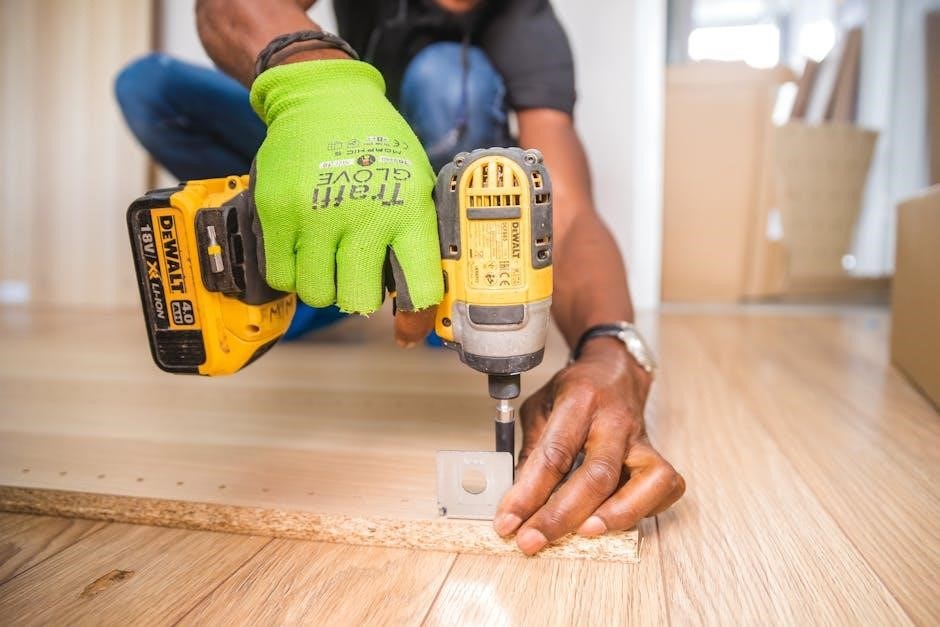
2.2. Tools and Materials Needed
To install the Honeywell 9000 thermostat, gather the necessary tools and materials. You’ll need a screwdriver (Phillips and flathead), wire strippers, and a voltage tester. Ensure you have compatible wires (18-22 AWG) and wall anchors for mounting. The thermostat kit includes the unit, wallplate, and screws. Disconnect power before starting to avoid electrical hazards. Refer to your system manual for specific wiring requirements. Having all tools and materials ready ensures a smooth installation process.
- Screwdrivers (Phillips and flathead)
- Wire strippers
- Voltage tester
- Compatible wires (18-22 AWG)
- Wall anchors
2.3. Safety Precautions and Power Shutdown
Before starting the installation, ensure the power to your HVAC system is turned off at the circuit breaker or fuse box. Verify the power is off using a voltage tester to avoid electrical shock. Handle the thermostat and wiring with care to prevent damage. Never work on live circuits, and keep loose clothing or long hair tied back. Follow all safety guidelines outlined in this manual and any additional precautions recommended by the manufacturer.
- Turn off power at the circuit breaker or fuse box.
- Use a voltage tester to confirm power is off.
- Avoid touching live wires or components.
- Follow all safety guidelines carefully.

Installation Steps
Mount the thermostat, connect wires to correct terminals, and power up the system. Follow step-by-step instructions for a smooth installation process.
- Mount the thermostat on the wall securely.
- Connect wires to the appropriate terminals carefully.
- Power up and complete initial setup procedures.
- Verify all functions are working properly.
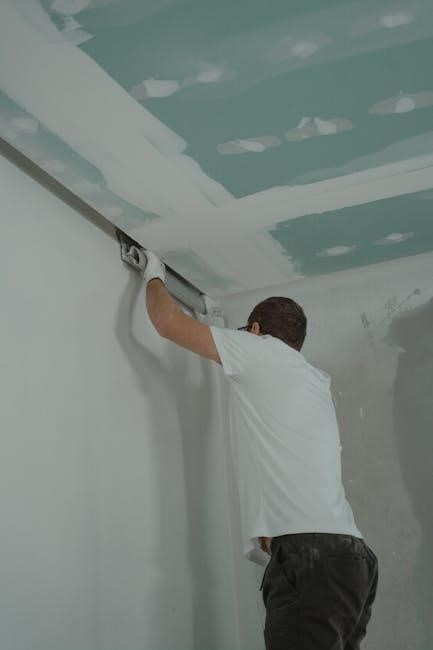
3.1. Mounting the Thermostat
Mounting the Honeywell 9000 thermostat begins with turning off power to the HVAC system. Remove the old thermostat and install the included wall plate. Use the provided screws to secure the wall plate to the wall, ensuring it is level. Peel the backing from the thermostat and press it firmly onto the wall plate until it clicks. Ensure proper alignment and a secure fit. Refer to the manual for exact dimensions and alignment instructions. This step ensures the thermostat is properly installed and ready for wiring. Always check the thermostat is level and securely attached.
3.2. Wiring Connections and Terminal Designations
Begin by disconnecting power to the HVAC system. Identify the terminal designations on your existing system and match them to the Honeywell 9000 terminals. Connect the wires to the corresponding terminals on the thermostat, ensuring secure connections. Refer to the manual for specific terminal labels (e.g., R, W, Y, G, C, etc.). Double-check compatibility and wiring configuration to avoid system malfunctions. If unsure, consult a professional or the installation guide. Proper wiring ensures safe and efficient operation of your Honeywell 9000 thermostat. Always follow safety guidelines during this process.
3;3. Initial Power-Up and Setup
After wiring, restore power to the system. The thermostat will boot up and display the initial setup screen. Follow on-screen prompts to select your system type, preferred language, and time zone. Set the current date and time. Choose your heating and cooling preferences. The thermostat will guide you through connecting to Wi-Fi and setting up a schedule. Test the system to ensure all functions operate correctly. If issues arise, refer to the troubleshooting section or user manual for assistance. This step ensures your Honeywell 9000 is ready for use.
Configuring the Thermostat
Configure your Honeywell 9000 thermostat by connecting to Wi-Fi, setting advanced preferences, and programming schedules. Follow on-screen instructions for a customized and energy-efficient setup experience.
4.1. Connecting to Wi-Fi Network
To connect your Honeywell 9000 thermostat to a Wi-Fi network, follow these steps:
- Touch the Menu on the thermostat’s touchscreen.
- Select Network or Wi-Fi Setup to view available networks.
- Choose your home’s Wi-Fi network from the list.
- Enter your network password when prompted.
- Wait for the thermostat to connect. A confirmation message will appear.
Ensure the thermostat is registered to enable remote access and advanced features.
4.2. Setting Advanced Preferences
After connecting to Wi-Fi, customize your Honeywell 9000 thermostat by setting advanced preferences. Access these settings through the Menu option on the home screen. Adjust temperature limits, humidity control, and scheduling preferences to suit your needs. Enable features like geofencing, smart alerts, and energy reports for enhanced efficiency. You can also set a keypad lockout to prevent unauthorized changes. These settings optimize performance and ensure your system operates according to your preferences. Refer to the user guide for detailed instructions on configuring each option.
4.3. Programming the Thermostat Schedule
Program your Honeywell 9000 thermostat to maintain optimal temperatures throughout the day. Use the 7-day scheduling feature to set up to 6 temperature periods daily. Select Menu, then Program Schedule to customize your preferences. Choose between Temporary Hold for short-term adjustments or Permanent Hold for lasting changes. The thermostat also offers energy-saving modes and geofencing integration to automatically adjust settings based on your location. This feature ensures your home is energy-efficient while maintaining comfort, even when you’re away.
Advanced Features and Settings
Explore smart home integration, energy-saving modes, and remote access via the Honeywell Home app. Utilize geofencing and advanced scheduling for enhanced comfort and efficiency.
5.1. Remote Access and Smart Home Integration
Remotely control your Honeywell 9000 thermostat using the Honeywell Home app. Access temperature settings, schedules, and system modes from anywhere with an internet connection. Enable smart home integration with platforms like Amazon Alexa or Google Home for voice control. Geofencing automatically adjusts temperature based on your location. Smart alerts notify you of extreme temperature changes or system issues. Integrate with other smart devices for a seamless home automation experience. Ensure your thermostat is connected to Wi-Fi and registered with Honeywell’s Total Connect Comfort for full remote functionality.
5.2. Energy Management and Savings Features
The Honeywell 9000 thermostat offers advanced energy management tools to optimize your heating and cooling usage. Features include smart alerts for energy-saving opportunities, detailed energy reports, and geofencing to adjust settings based on your location. The thermostat also learns your schedule and preferences to minimize energy waste. Use the Honeywell Home app to track and control energy consumption, reducing costs while maintaining comfort. These features help you make informed decisions to lower your energy bills and improve efficiency year-round.
Troubleshooting Common Issues
Troubleshoot common issues like connectivity problems or system incompatibility by checking wiring connections and ensuring proper power supply. Refer to the manual for detailed solutions.
6.1. Wi-Fi Connectivity Problems
Common Wi-Fi issues include difficulty connecting to networks or maintaining a stable connection. Ensure the thermostat is within range of your router and restart both devices. Verify network compatibility and check for software updates. If problems persist, reset Wi-Fi settings or perform a factory reset. Ensure the correct network is selected from the available list and enter the password accurately. Consult the user manual for advanced troubleshooting steps to restore connectivity effectively.
6.2. Wiring and System Incompatibility Issues
Wiring and system incompatibility can prevent proper thermostat operation. Ensure all wires match the terminal designations in the manual. Verify system type (heat pump, furnace, etc.) aligns with thermostat compatibility. Check for loose connections and damaged wires. If issues persist, consult the user manual or contact Honeywell support. Ensure the system’s C-wire is correctly connected for Wi-Fi functionality. If your system lacks a C-terminal, refer to the manufacturer’s guide for alternatives. Proper wiring ensures seamless integration and optimal performance of the Honeywell 9000 thermostat.
Maintenance and Upkeep
Regularly update the thermostat’s software for optimal performance. Clean the touchscreen and sensors to ensure accuracy. Check wiring connections to prevent issues. Schedule periodic checks to maintain efficiency and extend lifespan.
7.1. Regular Software Updates
Regular software updates are essential for maintaining optimal performance of your Honeywell 9000 thermostat. These updates enhance functionality, improve security, and add new features. Ensure your thermostat is connected to Wi-Fi to receive automatic updates. You can also manually check for updates through the Honeywell Home app or the thermostat’s menu. Always allow the update to complete without interrupting the process. Keeping your system up-to-date ensures compatibility with smart home integrations and maintains energy-saving features. Schedule periodic checks to verify the latest version is installed.
- Improves system performance and reliability.
- Enhances security and adds new functionalities.
- Ensures compatibility with smart home systems.
7.2. Cleaning and Hardware Maintenance
Regular cleaning and hardware maintenance ensure the Honeywell 9000 thermostat operates efficiently. Use a soft, dry cloth to wipe the touchscreen and remove dust or fingerprints. Inspect wiring connections for damage or corrosion and tighten any loose terminals. Replace batteries annually or as needed to prevent power interruptions. Clean the outdoor sensor (if applicable) to ensure accurate temperature readings. Periodically check the system’s air filter and ductwork for optimal performance. Proper maintenance extends the lifespan of your thermostat and ensures precise temperature control.
- Clean the touchscreen with a soft cloth.
- Inspect and tighten wiring connections.
- Replace batteries as needed.

Additional Resources and Support
For further assistance, refer to the official Honeywell Home website for user manuals, FAQs, and contact information for customer support.
8.1. Accessing the User Manual and Guides
The Honeywell 9000 user manual and installation guide are available on the official Honeywell website. You can download the PDF version or view it online. The manual includes detailed instructions for installation, programming, and troubleshooting. It also covers advanced features like Wi-Fi setup and energy management. Additional resources, such as video tutorials and FAQs, are provided to assist with common issues. For convenience, the manual is organized with a table of contents and search functionality, making it easy to find specific information quickly. Regular updates ensure the manual stays current with the latest features and improvements;
8.2. Honeywell Customer Support and FAQs
Honeywell offers comprehensive customer support to assist with any questions or issues related to the 9000 thermostat. Visit the official Honeywell website for a dedicated support page, where you can find FAQs, troubleshooting guides, and contact information. The FAQs cover common topics like Wi-Fi connectivity, installation, and software updates. For further assistance, reach out to Honeywell’s customer service team via phone, email, or live chat. Additional resources, such as video tutorials and user forums, are also available to help resolve issues quickly and efficiently.


Leave a Reply
You must be logged in to post a comment.